As a seasoned digital marketer and blogger, I’m here to simplify “how to start a blog on HostGator” for you. In the wide web world, HostGator is like a friendly helper. They make setting up a blog as easy as pie, whether you’re a business owner, a passionate writer, or someone with a story to tell.
You see, you don’t need to be a computer whiz with HostGator. Their platform is super easy to use, letting you focus on sharing your awesome ideas. Now, every blog needs a unique address. That’s your domain name. Picking a good one that fits your blog’s theme is key to getting folks to find and remember you.
HostGator also offers a variety of hosting plans to suit everyone. Whether you’re looking for something budget-friendly or a more advanced plan, they’ve got you covered. The cherry on top? They even give you a free domain when you sign up. So, starting a blog on HostGator isn’t just about getting a reliable place for your blog to live; it’s about unlocking endless possibilities. Let’s get started!
What You Need to Start a Blog on HostGator

Get Your Blog’s Web Address with a Domain Name
First, you’ll need a domain name if you want to start a blog on HostGator. A domain name is like your blog’s web address – it’s what people will type into their browsers to find your site. It’s important to choose a domain name that is easy to remember and reflects the theme or purpose of your blog. Think about keywords related to your niche or topic and try incorporating them into your domain name.
You can select a hosting plan on HostGator when you have your domain name. Once you have your hosting plan, you can use the website builder provided by HostGator to create your blog. To manage your blog, you can access the WordPress dashboard through HostGator’s platform.
Choose Your Passionate Niche or Topic
When starting a blog, choosing a niche or main topic you are passionate about is crucial. Writing about something you love will make blogging more enjoyable and sustainable in the long run.
Take some time to brainstorm different ideas and consider what excites you the most. Whether it’s travel, cooking, fashion, or technology, finding your niche will help you establish yourself as an authority in that area.
Set Clear Goals for Your Blog
Before diving into blogging on HostGator’s web hosting, take a moment to determine the purpose of your blog and set clear goals. Are you looking to share knowledge and educate others about web hosting? Do you want to monetize your blog through advertising or affiliate marketing related to hosting plans?
Understanding what you hope to achieve with your blog will guide your content creation strategy and help you stay focused on the main topics.
Familiarize Yourself with Basic Computer Skills
While starting a blog, it is important to have some basic computer knowledge. Ensure you are comfortable using email, browsing the internet, and navigating different websites. Familiarize yourself with common blogging platforms like WordPress (which can be easily installed on HostGator) so you can publish and customize your blog effortlessly.
Blogs are a great way to share your main topics with the world and increase your online presence. Don’t forget to optimize your blog posts with relevant keywords to improve search engine visibility.
Prepare Content Ideas in Advance
To hit the ground running when starting your blog on HostGator, having some content ideas ready is a good idea. Spend time brainstorming topics, outlining potential blog posts, and gathering reference materials.
Having a bank of content ideas will help you maintain consistency and avoid writer’s block in the early stages of your blogging journey. With HostGator’s web hosting and website builder, you can easily create and customize your blog with beautiful themes.
Step-by-Step Guide: Creating Your HostGator Account
So, you’ve decided to start a blog on your HostGator website? Great choice! HostGator is a reliable and user-friendly hosting provider that offers various plans to suit your blogging needs and budget. We’ll walk you through the process of creating your HostGator account so you can get started on your blogging journey.
Visit the HostGator website and click “Get Started” to create an account.
The first step in creating your HostGator account is to visit their website at their blog address. Once there, look for the “Get Started” button or a similar call-to-action that will lead you to the account creation process. This button is usually prominently displayed on their homepage, making it easy to find and click.
Choose between different hosting plans based on your needs and budget.
After clicking “Get Started,” you’ll have several hosting plans on the HostGator website. HostGator offers a range of options, including shared hosting, WordPress hosting, VPS hosting, and more. Take some time to consider your specific requirements and budget before selecting a plan that best suits your needs. Make sure to also check out their blog page for helpful information related to website hosting and management. Also, don’t forget to note down your blog address for easy access.
If you’re starting out with blogging, shared hosting is often a good choice for your website as it provides an affordable option to host your blog. It offers sufficient resources for most beginners regarding website performance and storage. However, if you anticipate high traffic or have specific technical requirements related to your chosen topics and keywords, you might want to explore other hosting options, such as VPS or dedicated hosting.
Enter your desired domain name or transfer an existing one to HostGator.
Once you’ve chosen a suitable hosting plan for your website, it’s time to select and register your domain name. A domain name is essentially the web address where users can access your blog (e.g., www.yourblogname.com). If you already have a domain registered elsewhere, don’t worry! You can easily transfer it over to HostGator during this step.
When registering a new domain on HostGator’s website, they provide a search tool to check the availability of your desired domain name. Choosing a domain name that is memorable, relevant to your blog’s topics, and easy to spell is important. Take time to brainstorm ideas and find the perfect domain representing your blog. Use a calendar to schedule when you will post on your website.
Complete the registration process by providing necessary personal information and payment details.
Once you’ve selected your hosting plan and entered your domain name, you’ll need to complete the registration process for your website. This step ensures that HostGator can set up your hosting account correctly and securely for your first blog post. Ensure that you provide the necessary personal information and payment details to finalize the setup of your blog address.
While setting up your website, you’ll be asked to provide details such as your name, email address, physical address, and phone number. Ensure that you provide accurate information, as it will be used for account verification purposes on the web host. Additionally, you’ll need to enter your preferred payment method (credit card or PayPal) to complete the transaction for your post.
Once registered, access your new account through the customer portal.
Congratulations! You’ve successfully created your HostGator account for your website. After completing the registration process, you’ll receive an email from HostGator containing important login details and instructions on accessing your account through their customer portal. Make sure to keep a note of your blog address as well.
To start managing your hosting account, follow the instructions on the website.
Choosing the Right Blogging Platform for HostGator
Now comes the important decision of choosing the right blogging platform that perfectly aligns with your needs and goals. With so many options, it can be overwhelming to make a choice. But fret not; I’m here to guide you through the process.
WordPress: The Popular Choice
WordPress is undoubtedly the most popular one. It offers a user-friendly interface, extensive customization options, and a vast array of plugins that can enhance the functionality of your blog. Whether you’re a beginner or an experienced blogger, WordPress provides an intuitive experience that makes it easy for anyone to create and manage their blog on HostGator.
Consider Other Platforms for Specific Requirements
While WordPress may be the go-to choice for most bloggers, it’s essential to consider other platforms like Joomla or Drupal if you have specific requirements for your blog. These platforms offer advanced features and functionalities that might better suit your needs.
For instance, if you plan to build a complex website with multiple content types and user permissions, Drupal could be an excellent option. Similarly, Joomla provides robust social networking capabilities and powerful content management features.
Evaluating Features Is Key
When choosing a blogging platform for HostGator, evaluating various features becomes crucial in making an informed decision. Here are some factors you should consider:
- Ease of Use: Look for a platform that offers a user-friendly interface and requires minimal technical knowledge.
- Customization Options: Ensure the platform allows you to customize your blog’s appearance according to your preferences.
- Plugin Availability: Check whether the platform supports a wide range of plugins that can add functionality to your blog.
- Community Support: Opt for a platform with an active community where you can seek help and guidance.
- User Reviews and Ratings: Research what other users say about the platform to gauge its reliability and performance.
Free Trials and Demos
To make an informed decision, take advantage of free trials or demos offered by different platforms. This lets you get hands-on experience with each platform, exploring their features and functionalities firsthand. By testing them out, you can determine which one feels most comfortable for your blogging journey on HostGator.
Customizing Your WordPress Theme for a Unique Look

You’ve set up your blog on HostGator using WordPress. Now it’s time to make it stand out and give it a unique look that reflects your brand or personal style. Luckily, WordPress offers a wide range of customization options that allow you to tweak every aspect of your chosen theme. Let’s dive in and explore how you can customize your WordPress theme to create a visually stunning and personalized website.
Explore the Wide Range of Free and Premium WordPress Themes Available
One of the great things about WordPress is the vast selection of themes available for you to choose from. Whether you’re looking for something clean and minimalistic or bold and vibrant, there’s a theme out there that will suit your taste. Take some time to browse the free themes in the WordPress Theme Directory, or consider investing in a premium theme for even more design options.
When selecting a theme, consider responsiveness, ease of customization, and compatibility with popular plugins. Look for themes with positive user reviews and regular developer updates. Once you’ve found the perfect theme that aligns with your vision, it’s time to start customizing!
Customize Your Chosen Theme by Adjusting Colors, Fonts, and Layouts
WordPress provides an intuitive interface within its dashboard that allows you to customize various aspects of your chosen theme easily. To begin, navigate to the “Appearance” tab in your WordPress dashboard and click “Customize.” Here, you’ll find various options for modifying colors, fonts, layouts, backgrounds, etc.
Experiment with different color schemes until you find one that matches your brand or personal style. Consider using colors that evoke specific emotions or convey the message you want to communicate through your blog. Choose fonts that are easy to read while reflecting the overall tone of your content.
Don’t be afraid to play around with different layouts to find the one that best showcases your content. WordPress offers various options for arranging widgets, sidebars, and navigation menus. Take advantage of these features to create a layout that seamlessly enhances user experience and guides visitors through your site.
Install Plugins to Enhance Functionality and Add Additional Features
WordPress plugins are like little power-ups for your blog. They allow you to extend the functionality of your website by adding new features and capabilities. Whether you want to integrate social media sharing buttons, display related posts, or optimize your site for search engines, a plugin can help you achieve it.
To install a plugin, go to the “Plugins” tab in your WordPress dashboard and click “Add New.” From there, you can search for specific plugins using keywords like “social media,” “SEO,” or any other functionality you want to add. Once you’ve found a plugin that suits your needs, click “Install” and “Activate.”
Remember to choose plugins from reputable developers with positive reviews and regular updates. Outdated or poorly coded plugins can slow your site or pose security risks. Keep an eye on the compatibility of each plugin with your theme as well.
Optimize Your Theme for Mobile Responsiveness
In today’s mobile-centric world, it’s crucial that your blog looks great and functions seamlessly on all devices. Using WordPress offers a significant advantage in effortlessly creating a mobile responsive website. When you pick the right plugins and themes, your website becomes well-equipped. Fortunately, most sought-after themes prioritize mobile-friendliness during their development, simplifying your workflow by merely selecting the appropriate theme.
Tips and Tricks for Web Hosting on HostGator
Regularly backup your blog’s data to prevent loss in case of technical issues or accidents.
Backing up your blog’s data is crucial to ensure you don’t lose all your hard work in the event of a technical glitch or an accidental deletion. HostGator provides several options to help you easily backup your blog. One option is to use the built-in backup tool available in the control panel. This tool allows you to create a full website backup, including all files, databases, and configurations. You can schedule regular backups, so you’ll always have a recent copy of your blog, even if something goes wrong.
Another way to safeguard your data is by using external backup services. Many third-party tools offer seamless integration with HostGator, allowing you to back up your website and store it securely offsite automatically. These services often provide additional features like versioning, which lets you restore previous versions of files if needed.
Remember that backups are only useful if they are up-to-date. Make it a habit to check and verify that your backups are regularly functioning. Test restoring from a backup periodically to ensure everything is working as expected. By taking these precautions, you can know that even if disaster strikes, you won’t lose all the time and effort invested in building your blog.
Optimize images by compressing them without compromising quality for faster loading times.
Images play a crucial role in engaging readers on your blog, but they can also slow down page load times if not optimized properly. To ensure fast-loading pages without sacrificing image quality, consider compressing images before uploading them onto HostGator.
Various image compression tools are available online that allow you to reduce file sizes while maintaining acceptable image quality. These tools utilize advanced algorithms to remove unnecessary metadata and optimize color palettes without noticeable visual degradation. By reducing the size of your images, you can significantly improve the loading speed of your blog.
Consider using responsive images to enhance the user experience on different devices. Responsive images automatically adjust their size and resolution based on the device they are viewed on. This ensures your blog looks great and loads quickly, accessed from a desktop computer, tablet, or smartphone.
Always test your website’s performance after optimizing images to ensure the changes have positively impacted you. Tools like Google PageSpeed Insights can provide valuable insights and recommendations for further optimization.
Utilize caching plugins to improve website performance and reduce server load.
Caching plugins are powerful tools that can enhance the performance of your blog by storing static versions of your web pages. When a visitor accesses your site, the cached version is served instead of generating each page from scratch, resulting in faster load times and reduced server load.
HostGator offers various caching plugins that seamlessly integrate with their hosting environment. These plugins allow you to configure caching rules based on specific criteria such as page types or user roles. Utilizing these plugins effectively ensures that your visitors enjoy a smooth browsing experience while reducing the strain on your server resources.
When choosing a caching plugin, consider its compatibility with other tools and features you may use on your blog. Look for options that offer flexibility regarding cache expiration settings and support for mobile devices.
Writing SEO-Optimized Content for Your HostGator Blog
Conduct Keyword Research for Effective Blog Posts
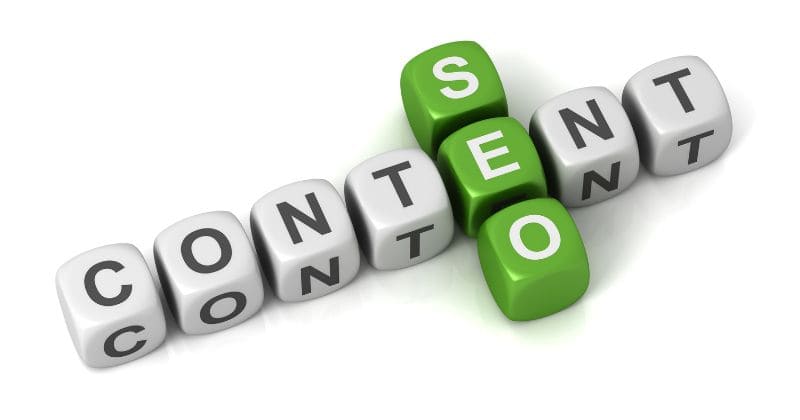
Before diving into writing your blog posts on HostGator, it’s crucial to conduct keyword research. Tools like Google Keyword Planner or SEMrush can help you identify the most relevant keywords for your content. By understanding what people are searching for, you can tailor your blog posts to match their intent and increase your chances of ranking higher in search engine results.
When conducting keyword research, look for keywords that balance search volume and competition well. This will ensure that you’re targeting keywords with enough traffic potential while still being achievable to rank for. Once you’ve identified your target keywords, incorporate them naturally throughout your content.
Incorporate Relevant Keywords Naturally
While including relevant keywords in your blog posts is important, avoid overstuffing them. Search engines frown upon keyword stuffing and may penalize your website as a result. Instead, focus on using keywords naturally within the context of your content.
For example, if you’re writing a blog post about “Healthy Food Recipes,” make sure to mention related keywords such as “healthy eating,” “nutritious meals,” or “clean eating.” Sprinkle these keywords throughout the text organically and seamlessly. This helps with SEO and enhances the readability and flow of your content.
Write Compelling Meta Titles and Descriptions
Meta titles and descriptions significantly attract clicks from search engine results pages (SERPs). When crafting these elements for your HostGator blog posts, aim for a compelling and concise copy that entices users to click through.
Your meta title should accurately reflect the topic of your blog post while incorporating relevant keywords. Make it catchy and attention-grabbing without being misleading. Optimize your meta description by briefly summarizing what readers can expect from the article. Consider including a call-to-action or highlighting the value readers will gain from clicking on your link.
Use Header Tags to Structure Your Content
Header tags (H1, H2, etc.) are essential for organizing your blog post’s structure and improving its readability. Both readers and search engines benefit from well-structured content that is easy to navigate.
Start with an H1 tag for your main blog post title. This should be concise, descriptive, and include relevant keywords. Subheadings within your content can then be formatted using H2 or lower header tags. These subheadings break up your text into digestible sections, making it easier for readers to skim through and find the information they want.
Create High-Quality Content That Provides Value
While SEO optimization is important, don’t forget that creating high-quality content is equally crucial. Your HostGator blog posts should provide value to readers by addressing their search intent and offering valuable insights or solutions.
Focus on thoroughly researching your topics to ensure you provide accurate and up-to-date information. Incorporate examples, statistics, case studies, or personal experiences to support your points and make the content more engaging. By delivering valuable content consistently, you’ll build trust with your audience and establish yourself as an authoritative source in your niche.
Building a Successful Blog on HostGator
Congratulations! You now have all the knowledge and tools you need to start a successful blog on HostGator. Following the step-by-step guide, you’ve created your HostGator account and chosen the right blogging platform. You’ve also customized your WordPress theme to give your blog a unique look.
To ensure the success of your blog, it’s important to remember some tips and tricks for web hosting on HostGator. Take advantage of their reliable services and use their helpful support team whenever needed.
Writing SEO-optimized content is crucial for driving traffic to your HostGator blog. By implementing the strategies we discussed, you can improve your search engine rankings and attract more readers.
In conclusion, starting a blog on HostGator is an exciting journey that allows you to share your passion with others. You can build a successful blog that resonates with your audience with the right approach and dedication.
Now it’s time for action! Start implementing what you’ve learned today, and watch as your blog grows. Don’t hesitate to contact the vibrant blogging community or seek guidance from experienced bloggers who can provide valuable insights.
Building a successful blog takes time and effort, but with HostGator as your trusted hosting provider, you’re already off to a great start!
FAQs
Is HostGator good for blogs?
HostGator is often considered suitable for blogs due to its robust features. It offers scalable hosting options, one-click WordPress installation, and 24/7 customer support. Additionally, HostGator provides a 99.9% uptime guarantee and various SEO tools, which can enhance your blog’s performance and visibility.
Can I monetize my blog hosted on HostGator?
Blogs hosted on HostGator can be monetized through various methods, such as Google AdSense, affiliate marketing, and sponsored posts. HostGator’s cPanel offers easy integration options for ad services, making the monetization process straightforward. Effective SEO strategies can further enhance revenue generation.
How long does it take for my new domain name to become active?
The activation time for a new domain name, commonly known as DNS propagation, can range from a few minutes to 48 hours. This period allows global DNS servers to update their caches with your domain’s DNS information. Factors like the domain registrar’s settings and ISP cache policies can affect this time frame.
Can I switch blogging platforms after starting my blog on HostGator?
Switching blogging platforms after initiating your blog on HostGator is feasible. HostGator supports common content management systems like WordPress, making data export and import straightforward. Keep in mind that DNS settings and SEO configurations may require adjustments post-migration to maintain site integrity and rankings.
Can I use my own custom domain name with HostGator?
Utilizing a custom domain name with HostGator is entirely possible. HostGator offers domain registration services but also supports domain names registered elsewhere. Domain Name System (DNS) settings must be configured to point to HostGator’s servers for successful integration and website hosting.
How do I ensure my WordPress theme is mobile-friendly?
To ensure your WordPress theme is mobile-friendly, choose a responsive theme that automatically adjusts its layout based on the device used. Test your website across different screen sizes and devices to ensure optimal viewing experience for all visitors.
Is there any limit on how much traffic my blog can handle on HostGator?
Traffic limits on a blog hosted with HostGator depend on the hosting plan selected. Shared hosting plans have resource limits, which could restrict high-traffic sites. However, HostGator offers dedicated and VPS hosting options designed to handle increased traffic volumes, ensuring scalability and performance.
Does HostGator provide support for technical issues?
HostGator offers 24/7 customer support to address technical issues, available via live chat, phone, and email. The service also includes an extensive knowledge base and video tutorials. HostGator provides specialized support through server management services for more complex technical challenges.
