
Are you tired of writing blog posts that fail to capture your readers’ attention? Have you been struggling to keep your audience engaged till the end? Look no further! The solution lies in our comprehensive blog post checklist.
With 37 easy-to-follow steps, this checklist will take your blog posts to the next level and ensure that everything you publish is set up for success. From conducting topical and keyword research to optimizing image file names and alt text, each step is meticulously designed to make a massive impact.
Don’t settle for mediocre blog posts anymore. Download our checklist now and start writing winning blog posts that leave a lasting impression.
Why use a Blogging Checklist?
A blogging checklist is an essential tool for ensuring a successful blog post. It helps improve the blog post’s organization, consistency, and overall quality. By having a checklist, bloggers can ensure they don’t forget any important details while setting up their blog.
The checklist can also help track progress and identify potential problems early on. Moreover, it saves time by ensuring that no important detail is missed. A well-structured checklist can help bloggers develop a successful post that their followers will love reading and sharing.
Therefore, it is highly recommended that bloggers use a checklist to set up their blog to achieve their desired goals.
Preparation and Planning
Planning is key and I personally lost 100s of hours on my first 2 blogs due to poor planning. So, before we start typing away, let’s take a moment to focus on the crucial steps of preparation and planning, which will ensure our blog post is not only engaging but also well-organized and purposeful.
Identify Your Audience
Identifying your audience is crucial when preparing and planning a blog post. To do this, consider creating a reader avatar or identifying your target audience. Determine their knowledge level on the topic, what problem they are facing that your post can address, and the goal of your post.

Keep your audience in mind throughout the writing process. Ask yourself what questions or objections your ideal reader might have, what other information they may seek, and if your tone is appropriate for your audience.
Additionally, ensure that your sources are accurate and link directly to the original source of information whenever possible. By understanding who you’re writing for, you can tailor your content accordingly and create posts that resonate with your audience.
Choose a Relevant Topic
Choosing the right topic for your blog post is crucial for its success.
- First, identify your target audience and understand their interests and pain points. This will help you come up with a topic that resonates with them.
- Next, make sure the topic aligns with your blog’s niche. It should be relevant to your blog’s theme and add value to your readers. To create unique and valuable content, analyze the competition and see what they write about. Look for gaps in the market and find ways to provide a fresh perspective on the topic.
- Finally, ensure the topic is something you know and can offer a solution or insight on. Following these tips lets you choose a relevant and engaging topic for your blog post.
Conduct Comprehensive Research
To conduct comprehensive research for a blog post, it’s important to start by finding credible sources. Google your topic incognito and open every link in the first two pages of results. Read through every link and save any URLs you think are useful. Check that your sources are accurate and link directly to the original source of information whenever possible.
As you research, note any interesting information, facts, or ideas you might want to research further for your post. Consider creating surveys using CrowdSignal or Twitter polls to gather unique information and data. Before you start writing, spend an hour or more researching to ensure your post is not poorly researched.
Organize Your Research
Once you have completed your research, organize your notes and create an outline. Make sure to cover everything you want to without forgetting any important details. Keyword research is also essential to ensure that your post gets search traffic. Use SEO tools to help you gain insight into what people search for on the internet and how to appear at the top of their search results.
In summary, comprehensive research for a blog post involves finding credible sources, taking down notes, creating an outline, and doing proper keyword research. By following these tips, you can create a detailed and comprehensive post that will answer every reader’s question. Remember to maintain a professional and informative tone throughout your research and writing process.
Create a Detailed Outline
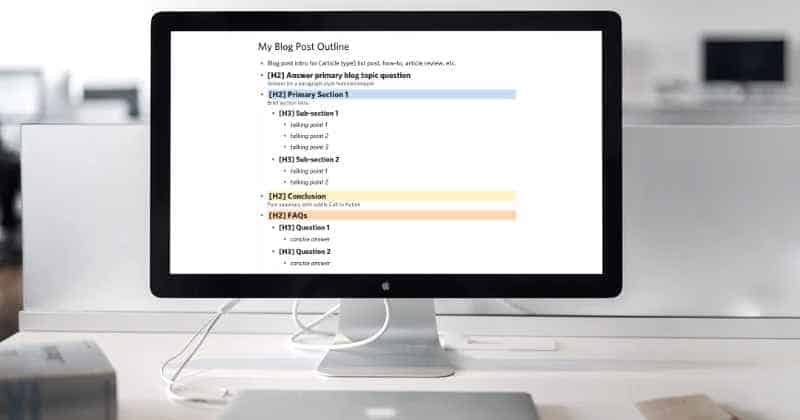
Creating a detailed outline for a blog post is essential for staying on track and communicating a clear message. An effective outline should include a summary of the topic and your angle, each header and sub-section your post will cover, and two or three bullet points for each section.
The outline should serve as a roadmap for the story you want to tell, illustrating where the story starts, where it ends, and all the destinations you’ll stop at along the way. Benefits of having a detailed outline include improving post quality, saving time, and keeping readers focused and engaged.
To efficiently organize the outline, start with the main idea and subheadings, then add brief bullet points under each subheading. Don’t overthink the outline; just make a start and flesh it out later. Remember to include an introduction and conclusion, and consider adding an “explainer” section for beginners.
Define the Purpose of the Blog
Defining the purpose of your blog is crucial because it helps you stay focused and communicate a clear message to your readers. It also helps you set goals and plan your content accordingly.
To define the purpose of your blog, start by deciding on the main goal you want to achieve with your blog. This could be to inform, entertain, persuade, or a combination of these.
Once you have a clear purpose, create an outline for each blog post to ensure your writing communicates a distinct message. Remember always to ask yourself if what you’ve written helps achieve the purpose of your blog.
Consider the Shelf Life
Considering the shelf life of your blog post is crucial in determining the longevity and relevance of your content. The shelf life refers to when a post remains relevant and useful to readers. Timely pieces may have a shorter shelf life, while evergreen content can remain relevant for years.
Factors affecting shelf life include current events, trends, and technological changes. To maximize the shelf life of your post, focus on creating evergreen content, updating outdated information, and promoting your post through social media and email marketing.
Writing the Blog Post
As we start the process of penning our blog post, let’s focus on creating engaging content that begins with a compelling headline and flows smoothly to a satisfying conclusion.
Craft a Compelling Headline

Crafting a compelling headline for a blog post is crucial as it’s the first thing readers see and determines whether they will click through to read the article. A good headline should be concise, informative, and attention-grabbing. Use action verbs and emotional words, and keep it to seven or eight words.
Use tools like CoSchedule’s Headline Analyzer Studio or IsItWP’s headline analyzer to help improve your headlines. Successful headlines often use numbers and how-to guides, describing the post’s content while telling the reader about its format.
Avoid using clickbait, and always ensure that your headline accurately reflects the content of your post. Remember, 8 out of 10 people will only read your headline, so invest the time and effort needed to create a headline that will grab their attention.
Write an Engaging Introduction
Are you struggling with high bounce rates on your blog? It might be time to take a closer look at your introduction. Your intro is the gateway to your content, and if it doesn’t capture your reader’s attention, they’ll hit the back button in seconds. But don’t worry; crafting a captivating intro doesn’t have to be daunting.
- Start with a beautiful opening line that connects with your audience and makes them believe you know exactly what they want.
- Then, introduce the problem your post will solve and hint at the solution they’ll find in your content.
- Finally, make a promise of benefit to the reader and explain what they can expect to gain from reading your post.
For inspiration, check out successful intros like Neil Patel’s in “How I Generate 18,800 Visitors from Google Without SEO or Ads.” With these tips, you’ll be on your way to writing intros that keep your readers engaged from start to finish.
Maintain a Focused and Conversational Tone
Maintaining a conversational tone in your blog post is crucial to keeping your readers engaged. To strike a balance between professional and relatable, start by reading what you’ve written back to yourself and see if it’s something you would say in a conversation.
Avoid using technical language and jargon; use language that is easy to understand for any audience. Keep your paragraphs short and concise, with each sentence under 25 words.
Additionally, consider using personal anecdotes to connect with your readers. This helps to make your post more relatable and helps to keep your readers engaged. Remember to focus on your topic and discuss one thing at a time. By following these tips, you can maintain a focused and conversational tone in your blog post.
Use Simple Language
When writing blog posts, using simple language that anyone can understand is important. Complicated words and long sentences can confuse readers and make the post difficult to read.
Simple language makes it easier for readers to follow along and skim through the post. By writing in a conversational tone and avoiding technical jargon, readers will feel more connected to the writer and be more likely to engage with the post.
Keeping the blog design clean and simple can establish trust with readers and make the post appear more professional. Overall, using simple language in blog posts improves the readability and accessibility for all readers.
Structure Your Content
To structure your blog post content, start with brief and rhythmical paragraphs, ensuring that each logically leads into the next. Vary longer and shorter paragraphs to create a good flow when reading.
Use Proper HTML Headings
- Use subheadings to separate your content, aiming to have no more than 300 words per section.
- Use the right heading levels, with H1 exclusively for the page’s title, followed by H2 and H3.
- Reserve H4 for longer posts or complex topics.
This makes your text more skimmable and makes it easier to find information.
Style and Formatting
Use a consistent formatting style across all your posts, creating a style guide for your blog. Ensure the formatting and tone matches your style guide to create a coherent voice that speaks to your target audience.
When writing, use a concise, engaging, and easy-to-understand tone that captures your audience’s attention and keeps them reading.
Finally, disclose any affiliate links at the top of your post, making it as clear as possible. Remember to keep your post concise, engaging, and easy to read, and ensure it follows your blog’s style guide.
Determining Optimal Blog Length
Striking a balance between brevity and depth is key when deciding on blog post length. Too short, and your post may lack substance. Too long, and you risk losing reader interest. So, how do you find the right length?
Purpose-Driven Length
Consider the goal of your post first. Are you sharing quick tips or conducting a detailed analysis? The length will vary based on your aim. Generally, aim for at least 300 words to satisfy both readers and search engines.
Engaging the Skimmers
Remember, many readers skim online content. To maintain their interest, divide your content into bite-sized sections. Use subheadings and keep paragraphs to three to four lines. Lists and bullet points can emphasize key points and enhance visual appeal.
SEO Considerations
Longer posts often rank higher in search engine results. But length alone won’t guarantee a top spot. Quality and relevance to the search query are also vital. However, longer posts offer more opportunities to include relevant keywords, potentially boosting your search engine ranking.
Finding the Right Length
How do you determine the right length? Start with your topic and goal. Quick tips or news updates can be short. But complex topics or detailed analyses may require longer posts. Generally, aim for 750 to 1500 words for most posts.
Balancing Reader Value and SEO
The key to the right blog post length is balancing reader value and engagement with SEO considerations. By structuring your content with subheadings and short paragraphs, using relevant keywords, and delivering value, you can create a post that’s both concise and detailed. This will keep your readers engaged and improve your chances of ranking higher in search engine results.
Add Value with Personal Experience
One of the best ways to add value to your blog post is by incorporating personal experiences. As an expert in your industry, you have unique insights and perspectives that can enhance your readers’ understanding of the topic.
By sharing stories from your past professional experience, you can make your post more relatable and engaging. This establishes you as an authority figure within your business sector and helps build a connection with your readers.
Remember to keep your tone friendly and conversational, as if you were sharing your experiences with a friend. Doing so can create a more enjoyable and memorable reading experience for your audience.
Include Tweetable Quotes
To include tweetable quotes in your blog post, utilize a plugin like Share on Twitter Block or Click to Tweet from Coschedule. This lets your audience easily share a quotable part from your article with just a few clicks.
Use short, impactful, easily shareable statements on Twitter to make your tweetable quotes stand out. For example, “Make it insanely easy for your readers to share your content. Use ‘Click to Tweet’ by @coschedule” or “People love to tweet good stuff.
Especially they don’t have to do any typing to tweet it. Easy peasy click-and-tweet me.” Remember to give credit to your sources and ensure your sources are accurate.
Implementing Lists and Bullet Points
In blog writing, using bullet points or numbered lists can enhance readability and visual appeal. This strategy can improve your post’s digestibility and increase your chances of being featured on Google.
Effective List Usage Tips
Here are some strategies for using bullet points and ordered lists effectively:
- Summarize long paragraphs with bullet points or numbered lists.
- Use subheadings to segment text and clarify your post’s structure.
- Highlight key points with bold or italic text.
- Use blockquotes to accentuate significant sections.
- Incorporate visual aids like images and videos to boost engagement.
- Apply an effective post outline to guide readers through your narrative.
Enhancing Readability and Engagement
Adhering to these strategies can enhance your blog post’s readability and accessibility. Keep your paragraphs brief and clear, and title each section descriptively. Utilizing bullet points and numbered lists can make your content more engaging and skimmable, increasing the average time visitors spend on your site and reducing the bounce rate.
Credit Your Sources
Crediting sources in a blog post is crucial for legal and ethical reasons. Not only does it show respect to the original author, but it also allows readers to track where information is coming from.
\When using content from others, always give credit by linking to the original source. Additionally, linking to other credible blogs and websites helps build a virtuous cycle of quality content.
To avoid losing readers, make sure external links open in a new browser tab or window. Finally, when using images, ensure you have the right to use them and properly cite the source. By crediting sources, you can increase the credibility and trustworthiness of your blog post.
SEO Optimizing the Blog Post

Selecting the Right Keyword
To optimize your blog post, start by choosing a specific keyword relevant to your topic. This keyword should have a good chance of ranking well in search engines.
Incorporating the Keyword
Once you’ve chosen your keyword, weave it into your title, headings, and body text naturally. Use related keywords to boost your post’s relevance and authority. Optimize your images, title tags, and meta descriptions with strategic keyword placement.
Boosting Search Visibility
Enhance your post’s visibility by including the keyword in the meta description, URL, and other on-page elements. Use bullet points to summarize key points and break up large text blocks. Keep sentences and paragraphs short for easy comprehension.
Utilizing Links and Calls to Action
Include internal and external links and a relevant call to action at the end of your post to improve your SEO. Use relevant images and videos to engage readers and enhance your narrative.
Comprehensive Content
Ensure your content answers the who, what, why, how, when, and where of your topic. This provides thorough answers to reader questions and improves your post’s value.
By following these steps, you can craft a high-quality post that ranks well in search engines and appeals to your target audience. Remember, optimizing your blog post for SEO requires careful planning and attention to detail.
Add Relevant Images and Media
Adding relevant images and media to a blog post is crucial for better engagement. Images make blog posts more attractive and scannable, and incorporating various media can increase links and time spent viewing content.
When selecting images, ensure you have the right to use them and properly cite the source. Use sites like Creative Commons, Pixabay, Flickr Commons, and Wikimedia Commons to find copyright-free images. Optimize images by adding appropriate branding and formatting them to fit the post’s aesthetics.
Use alt tags and descriptive file names to improve accessibility and search engine optimization. Creating a featured image, post image, and images for various social media platforms can enhance the post’s visibility and engagement. Remember to keep a consistent feel with all the images on your site.
Incorporate Links
When writing a blog post, it’s important to incorporate links to other relevant content on your website and external authority websites. Internal links to other posts on your blog help to keep readers engaged and on your site for longer, while external links to authority websites can improve the search engine ranking of your post.
To ensure that your links blend seamlessly with the text, use clear anchor text that accurately describes the content of the page you’re linking to. Avoid overusing links to your homepage or contact form, and only include links where they’re relevant to the topic at hand.
Use Internal and External Links
When adding links, aim for a balance between internal and external links, and consider the end user when deciding where to place them. Too many links can be overwhelming and detract from the overall reading experience.
Before publishing your post, check all links to ensure they work and point to the correct URL. This will help avoid frustrating your readers and ensure they can easily access the content you’re linking to.
In summary, incorporating links in a blog post is important for creating engaging and informative content. By using clear anchor text, balancing internal and external links, and checking your links before publishing, you can ensure that your links add value to your content and enhance the user experience.
Make External Links Open in a New Window

To optimize external links in your blog post, open them in a new window or tab. This ensures that readers stay on your website while exploring the linked content. To do this, simply add the “target=_blank” attribute to the link code.
Additionally, linking to credible external sources can improve your post’s value and search engine ranking. However, avoid linking to bad sites or resorting to link farming.
Before publishing, double-check that all links are working and lead to the intended page. By optimizing external links, you can provide a better user experience and enhance the credibility of your blog post.
Optimize Your URL
To optimize the URL of your blog post, it’s important to have a concise and descriptive URL that accurately represents the content of your post. This helps search engines and readers understand what your post is about. Including your main keyword in the URL is also important for SEO purposes.
Avoid using stop words or special characters in your URL, as these can make it harder for search engines to understand what your post is about. Use hyphens to separate words in your URL, making it easier to read and understand. Before publishing your post, preview the URL to ensure it works and points to the correct page.
By following these tips, you can create an SEO-friendly URL that accurately represents the content of your post and helps you attract more traffic to your blog.
Use Good HTML Structure
Using proper HTML structure is crucial for optimizing a blog post. It improves the readability and user experience of the post and helps search engines understand the content better. To optimize a blog post, use title, and header tags, bulleted and numbered lists, and separate paragraphs into sections of no more than 300 words.
Use H1 for the title, followed by H2 and H3 for subheadings. Use H4 for longer posts or complex topics. Keep paragraphs short and concise, with three to four lines maximum.
Use bullet points for lists and ensure consistent formatting throughout the post. By using proper HTML structure, you can make your blog post more skimmable and accessible to readers, which can increase engagement and drive more traffic to your blog.
Include Tables with Relevant Data
Tables are an effective way to present relevant data in a blog post. They help readers understand complex information at a glance and make comparing and contrasting different data points easier. When adding tables to your blog post, it’s important to format and design them in a way that’s both visually appealing and easy to understand. Here are some best practices to keep in mind:
- Keep it simple: Don’t overwhelm your readers with too much information. Stick to the most important data points and organize them clearly and concisely.
- Use clear headings: Make sure your table has a clear and descriptive title. Use headings to label each column and row so readers can easily follow along.
- Use consistent formatting: Choose a font and font size for your table. Use bold or italics to highlight important information, but don’t overdo it.
- Use contrasting colors: Use contrasting colors to make your table easy to read. For example, use light colors for the background and dark colors for the text.
- Provide context: Make sure to provide context for your data. Use a brief introduction to explain what the table is showing and why it’s important.
- Use captions: Use captions to provide additional context or explanation for your table. This can help readers understand the data better and provide more insight into your analysis.
- Avoid clutter: Don’t overcrowd your table with too many data points. Use white space to make your table easier to read and less cluttered.
Here’s an example of a well-designed and formatted table:
| Company Name | Revenue (in millions) | Number of Employees |
| ————– | ———————- | ——————— |
| Company A | 100 | 500 |
| Company B | 150 | 1000 |
| Company C | 75 | 250 |
This table’s headings are clear and concise, and the data is organized logically. The use of contrasting colors and white space makes it easy to read, and the caption provides additional context for the data.
Remember, tables can be a powerful tool when used correctly. By following these best practices, you can create visually appealing and easy-to-understand tables, making your blog post more engaging and informative.
Review and Edit
Before you hit publish, let’s ensure your blog post is polished and error-free.
The Art of Proofreading

Proofreading is essential to avoid errors that can tarnish your professional image. Start this task when you’re most alert. Don’t solely rely on spell checkers. Instead, read your post aloud or backward to catch mistakes. Take a break between writing and proofreading for a fresh perspective. If possible, seek feedback from a trusted friend or colleague.
Harnessing Editing Tools
Tools like Grammarly and Hemingway can aid in advanced editing and readability. Use your word processor’s spellcheck and preview your post for formatting errors. Highlight important sentences in bold and ensure consistent headline formatting. Lastly, conduct a final check for spelling, grammar, and clarity. Reading your post aloud can help ensure it communicates your message effectively.
Take a Break: A Secret Editing Weapon
Taking a break before editing is crucial for error-free, readable work. After drafting your post, step away for at least 6 hours or even a day. This allows you to return with fresh eyes, making it easier to spot mistakes and areas for improvement. Reading your post aloud or using editing tools can simplify the editing process.
Pre-Publishing Stages
We’re at the home stretch. Just a few remaining tasks before going live.
Crafting a Compelling Conclusion
The success of a blog post goes beyond well-researched content. It hinges on a persuasive wrap-up that recapitulates the key points and spurs readers’ engagement.
Remember, what action do you want your readers to take after reading your post? Factor this in as you craft your conclusion!
Deploying a Strong Call to Action
A strategically-placed call to action (CTA) can shift readers from passive scrolling to active engagement. It’s a nudge for them to subscribe to a newsletter or download a resource.
Ensure your CTA is conspicuous and the clicking benefits are obvious. Keep experimenting with different CTAs to find your winning combination.
Choosing the Ideal Blog Category
Selecting an apt category for your blog post is critical. The main topic of the post and your audience’s interests should guide this choice. A well-chosen category helps readers find similar content and boosts your search engine optimization.
Ensure the category accurately mirrors the post’s content and is intuitive for your readers to navigate.
Selecting a Captivating Featured Image
A compelling featured image can exponentially enhance the appeal of your blog post. It draws readers, fosters engagement, and boosts social media shares.
The featured image should be topical and visually enticing. Interspersing additional images throughout the post can help break up text and underscore your points.
PRO TIP: When starting a new blog project I like to create a Featured Image Template using CANVA. The free version is all you need. Plus you can use the online version or desktop version. Typically I size my featured image at 1,200 x 630 pixels.
Scheduling Your Post
Scheduling a blog post starts with selecting your publishing platform’s “New Post” option. Immediately set the date and time for publishing to prevent any inadvertent premature publishing.
Before scheduling, proofread your post thoroughly. Experts suggest that 8:00 am to 10:00 am on Mondays, Wednesdays, and Fridays work best for most blogs. Consider this timing to drive immediate traffic.
Lastly, preview your post to ensure it appears as expected on your site’s front end. Plan your blog post promotion by deciding on the networks and channels for sharing.
Checking and Double-Checking Your Post
A polished, error-free blog post is a by-product of careful reviewing. Here’s how to achieve it:
- Click the preview button to scan your post. Ensure sentences, headlines, and formatting are consistent and clear.
- I use tools like Grammarly to identify any spelling or grammar errors.
- Check all links and images for functionality.
- Add images or graphics to break up large text blocks.
- Verify your post’s appearance across different devices.
Ensure your post is error-free and visually pleasing before hitting publish.
Post-Publishing Essentials
After you hit the ‘publish’ button, your work is not yet done—promoting, engaging, updating, and monitoring your post are essential steps in maximizing your blog post’s impact and reach.

Boosting Your Post
Success post-publishing requires strategic promotion. Employing channels like social media, email marketing, and guest posting can significantly increase visibility.
- Begin with 2-3 social media platforms that your audience frequents. Draft intriguing social media messages promoting your post and schedule these at varying times to optimize visibility.
- Leverage email marketing by crafting captivating emails to your subscriber list. Personalize your email and align it with your audience’s interests.
- Engage in guest posting on other niche blogs. This not only boosts visibility but also drives traffic to your blog post. By reciprocating the gesture, they can link back to your blog post in their guest post.
Effective timing and a supportive network can further enhance promotion. Keep track of your results and recalibrate your strategy as needed.
Fostering Audience Engagement
Actively engaging with your audience post-publishing is a cornerstone of community building. Encourage feedback by posing questions or incorporating a call to action at your post’s conclusion.
A prompt and thoughtful response to comments signals your appreciation for reader input. Utilize social media and other platforms to continue dialogue with your audience. Remember, reader loyalty and increased engagement take time to foster.
Updating Your Post Regularly
Maintaining post relevancy entails regular updates, including new content addition, visual refreshes, and broken link fixes. Surprisingly, updating old posts can offer more advantages than writing new ones, driving increased value, traffic, and engagement.
Adjusting the publication date to the current day can bring posts back atop your feed. Experts recommend at least a yearly post update to maintain reader engagement and attract new readers.
Tracking Post Performance
Post-publishing, tracking how your post performs with your audience, is vital. Traffic is a critical metric to watch. Google Analytics can provide data on visitor numbers and duration spent on the page.
Conversion rate is another key metric to monitor, revealing the percentage of visitors performing a desired action. Also, keep an eye on the bounce rate, the percentage of visitors who leave without any engagement.
Tools like SEMrush or Ahrefs can help track your post’s search engine ranking. Regular monitoring and strategic adjustments based on these insights can enhance future posts’ performance.
Integrating FAQs and Wrapping Up
As we bring this blog post guide to a close, let’s delve into the value of FAQs in enriching your content and tie everything together with a compelling conclusion.
FAQ: Addressing Common Queries

Successful blog posts often anticipate and address the most common questions readers might have about the topic. To do this, start with thorough research to pinpoint frequently asked questions. The “People Also Ask” section on Google linked to your topic is a handy tool for this.
Craft clear, concise answers to these queries and incorporate them into your content using headings or bullet points. By making it easy for readers to find information, you encourage engagement. And don’t forget—visual aids like images, infographics, or videos can help illustrate your answers and engage your audience further. Always verify the accuracy of your sources and link to them directly when possible.
FAQ: Leveraging ‘People Also Ask’
Google’s “People Also Ask” feature gives a list of related queries users frequently search for, serving as a useful tool for blog post brainstorming. Click on a question to expand the answer and reveal even more related questions.
Spot common themes and use them as inspiration for your posts. Including the exact questions as headings in your posts can boost your SEO.
Wrapping it Up: Over to You
Now, with this blog post checklist at your fingertips, you’re set to create engaging, high-performing blog content.
Recall the importance of a powerful conclusion—it ties everything together, summarizes your main points, and leaves readers with a clear takeaway. A call-to-action, urging readers to comment, share, or subscribe, is often an effective conclusion tool to spark engagement. Lastly, proofread and check for errors to ensure your blog shines.
By applying these techniques in planning, drafting, and publishing, you’ll be writing successful blog posts in no time. Now it’s over to you—happy blogging!
FAQ
How do you write a checklist for a blog post?
Writing a checklist for a blog post involves creating a detailed list of required steps, starting from ideation to publishing. It includes topic research, keyword identification, creating an outline, writing engaging content, adding images or multimedia, proofreading, optimizing for SEO, and scheduling or publishing the post.
What are the steps to write a blog post?
The steps to write a blog post include researching a relevant topic, identifying target keywords, drafting an outline, creating engaging content, incorporating images and multimedia, editing for clarity and grammar, optimizing the post for SEO, and finally, publishing or scheduling the post on your website.
What does a good blog post include?
A good blog post includes a compelling title, engaging introduction, well-researched content with appropriate headers, keywords for SEO optimization, relevant images or multimedia, internal and external links, a clear call to action, and a concise conclusion. It should be formatted for readability and proofread for grammatical accuracy.
How do you structure a blog post?
Structuring a blog post typically includes a compelling title, an engaging introduction, a body section with well-organized headers, and a concise conclusion. Important components also involve incorporating keywords for SEO, adding relevant multimedia elements, and including internal and external hyperlinks. The content should be formatted for readability.