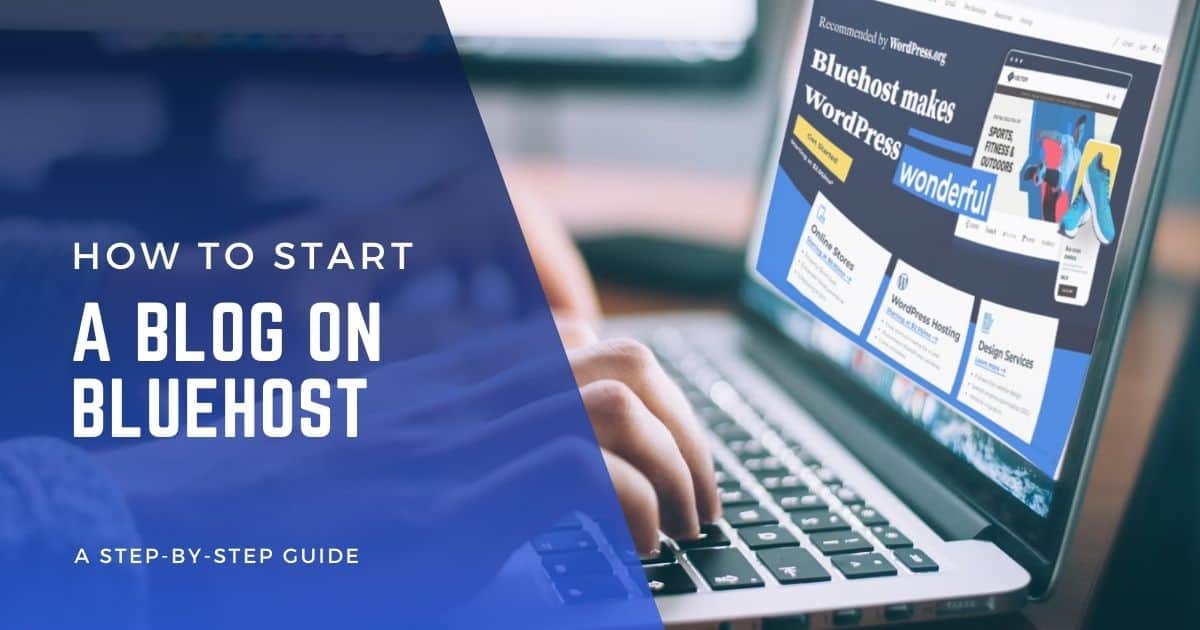
We all start somewhere. Setting up a blog can sound like a big step, but with Bluehost, it’s simpler than you’d expect. I remember my initial days of blogging, looking for a reliable host without breaking the bank. Bluehost was that beacon for me, and today, I’ll share how you can easily set yours up there too.
Having been a digital marketer and professional blogger for years, I’ve seen and tried various hosting platforms. But Bluehost consistently stands out, especially for new bloggers. With this guide, think of me as your tech-savvy friend who’ll guide you, minus all the jargon.
For those curious about how Bluehost stacks up against other hosting options or want to learn more about blogging, check out this comprehensive list of the best blog hosts. Eager to start your blog with Bluehost? Let’s set things in motion!
What Do I Need to Start a WordPress Blog?
Getting Started with Bluehost
When you’re looking to start a blog, two things are essential: a domain name and web hosting. Your domain name is like your blog’s address, while web hosting ensures your blog is always online. Bluehost, known for its WordPress hosting, makes the process simple.
“With Bluehost, you can automatically install WordPress and start blogging quickly and easily.”
Understanding WordPress
After securing a domain and hosting, it’s time for WordPress. This free, open-source blogging software is user-friendly. You can choose between:
- Free Version: Comes with many free themes and plugins.
- Paid Version: Offers extra features and support.
Why Blog with Bluehost and WordPress?
Blogging on Bluehost with WordPress offers benefits like domain ownership and potential earnings. Plus, with WordPress, you can customize your site and access a vast array of plugins to enhance your blog, thanks to the extensive WordPress plugin directory.
How to Set Up Your Bluehost Account
Steps to Create a Blog on Bluehost:
- Sign up for a Bluehost account.
- Choose a domain name.
- Install WordPress via Bluehost’s cPanel.
- Select a WordPress theme.
- Begin creating posts.
Bluehost’s interface and one-click WordPress installation make the process straightforward for users.
Why Choose Bluehost?
Bluehost is a leading web hosting company known for its affordable, reliable, and secure hosting plans. In just a few steps, you can have your blog online. Plus, with Bluehost’s top-notch customer service, you’re never alone in your blogging journey.
Before diving in, it’s essential to pick a hosting plan that fits your needs. The basic plan, popular among beginner bloggers, offers all the necessary features at a budget-friendly monthly rate. Remember, opting for a yearly payment can save you more in the long run.
Your blog’s domain name is its online address. It’s how readers will find you. If you’re unsure about a name, consider using your own. Once decided, you’ll need to provide basic information to set up your Bluehost account, like your name, email, and billing details.
To wrap up the setup, you’ll enter your credit card details. Rest assured, Bluehost ensures a secure transaction process. With everything in place, you’re all set to install WordPress and kickstart your blog design. Trust in Bluehost to keep your site live and reachable for your audience.
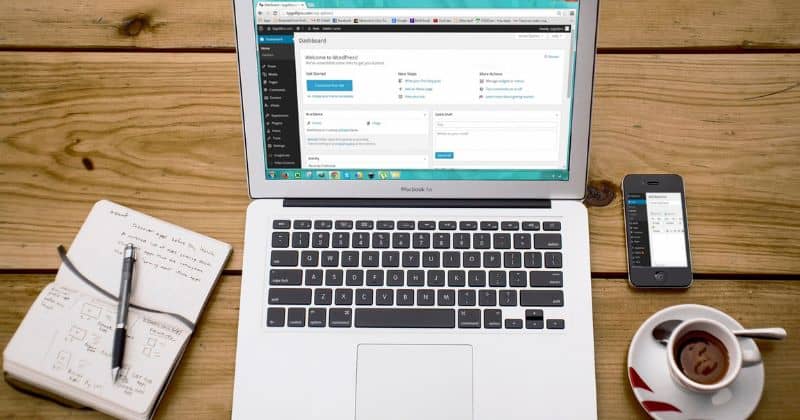
Getting Started with WordPress
After setting up your Bluehost account, the next step is to familiarize yourself with WordPress. As the world’s most popular content management system, WordPress offers a plethora of features:
- Themes: Choose from thousands of free premium themes to give your blog a unique look.
- Plugins: Enhance your blog’s functionality with plugins, whether for SEO, social media sharing, or e-commerce.
- Dashboard: The WordPress dashboard is your control center. You can create posts, manage comments, and customize your site’s appearance from here.
- Updates: Regular updates ensure your blog remains secure and benefits from the latest features.
By spending some time exploring WordPress, you’ll discover how flexible and user-friendly it is, making your blogging journey enjoyable and efficient.
Choose Your Domain Name
Choosing a domain name is the first step in setting up a Bluehost account. Your domain name is the web address for your blog, and it’s crucial to choose a domain name that aligns with your blog’s theme. Here are some pointers:
- The domain name should be easy to remember and search engine friendly.
- Consider using your name if you’re unsure about the choice.
- There are many free domains available during the Bluehost sign-up.
- Think about domain privacy protection to shield your personal details. Remember, it’s an added cost.
After finalizing your domain name, you’ll move on to providing the necessary details for your Bluehost account setup.
Selecting a Hosting Plan
When purchasing a hosting plan, opting for at least a 12-month plan is recommended. This duration offers:
- Discounted pricing
- A free blog domain
- A seamless web host experience
It’s essential to weigh all options and select a domain name that resonates with your blog’s essence.
Fill Out Your Bluehost Account Information
In this phase, you’ll need to provide specific details:
- Name
- Email Address
- Billing Information
Rest assured, your credit card details are kept confidential. Additionally, you can choose to add domain privacy protection.
As you progress with the Bluehost sign-up, you’ll encounter questions about your website creation experience. If you’re a novice, opting for “a little” is advisable. This choice ensures you get the basic hosting plan features without extra configurations.
Installing WordPress on Bluehost
Installing WordPress on Bluehost requires an account and payment information. To get started, the first step is to create a hosting account. A hosting account is basically a space on a server that your website will be stored on. To create an account, you will need to provide your name, address, email, and payment details.
You can log into your Bluehost dashboard once you have created your hosting account. The Bluehost dashboard is the control panel where you can access and manage your hosting account. The dashboard gives you access to all of the features and services offered by Bluehost, including the ability to install WordPress.
You can begin the installation process once you have logged into your Bluehost dashboard.
Log Into Your Bluehost Dashboard
Logging into the Bluehost dashboard is the initial step in setting up a WordPress blog. This dashboard is your gateway to many features tailored for seamless website management. To access it, simply use your credentials: username and password. Once inside, you’ll find the “My Sites” tab, your one-stop hub for everything Bluehost offers.
The Bluehost dashboard provides:
- Options and settings for your website and hosting.
- Tools to create and manage your WordPress blog.
- Access to the WordPress plugin directory.
- Analytics for your website.
- Hosting package management.
- Support services access.
One of the standout features of the Bluehost dashboard is the one-click WordPress installation. Just hit the “Install WordPress” button, and Bluehost takes over, setting up WordPress for you in a jiffy. After this, you’re all set to dive into the WordPress dashboard.
Install WordPress: A Simple Process
Installing WordPress on Bluehost is straightforward. Start by navigating to the Bluehost dashboard and selecting the “Install WordPress” option. Let Bluehost handle the rest. In no time, you’ll find yourself inside the WordPress dashboard, the heart of your blog’s operations.
From this central hub, you can:
- Craft new posts.
- Incorporate multimedia like photos and videos.
- Customize the look and feel of your blog.
- Explore the WordPress plugin directory for added functionalities.
Upon first logging in to the WordPress dashboard, you’ll be prompted to set a username and password. Once done, you’re automatically logged in and free to start your content creation journey. Remember, with WordPress, the sky’s the limit. Whether designing your blog or adding functionalities through plugins, WordPress has got you covered.
“Once WordPress is installed, your canvas awaits. Paint it with your creativity.”
Designing Your Blog
Designing your blog is an important step in creating a successful website. It involves choosing a theme, customizing it to fit your preferences, and ensuring it looks great and is easy to navigate. Your blog theme should be unique and reflect your brand while also being user-friendly and optimized for search engines.
Consider the design, speed, and features available when choosing a theme. Many free themes are available, and you can also purchase premium themes from third-party sites. Once you have chosen a theme, you can customize it to make it your own. This can be done through the WordPress Customizer, which allows you to change various aspects of your theme, from colors and layouts to widgets and menus.
By following these steps, you can create a WordPress website and a blog that looks great and is easy to navigate.
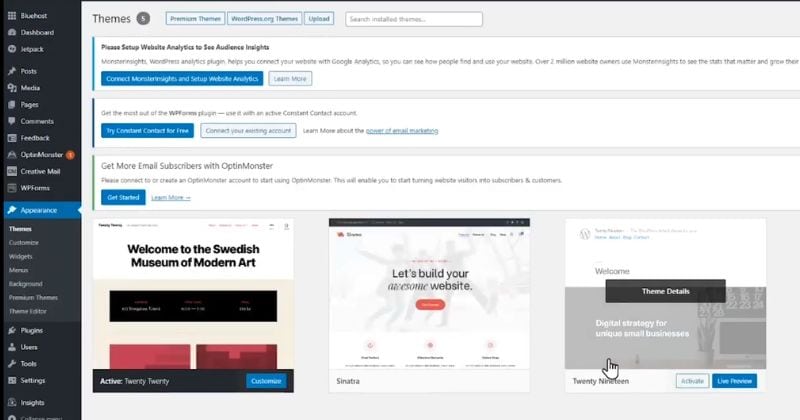
Choose a Theme
Choosing a theme for your blog is a pivotal step in the blogging journey. WordPress offers a plethora of themes, both free and premium, catering to various needs. Your theme is essentially the face of your blog, so it’s vital to pick one that aligns with your vision.
Key Considerations:
- Design: Does it resonate with your brand or blog’s tone?
- Speed: A faster theme can improve user experience and SEO.
- Features: What functionalities does the theme offer?
Popular free themes include:
- Twenty Seventeen
- Twenty-Sixteen
- Astra
- Kadence
For those seeking more options, there are numerous resources, such as blog posts reviewing the best WordPress themes for bloggers, both free and premium.
Dive into Customization
Once you’ve settled on a theme, the real fun begins: customization. The WordPress Customizer is your toolkit here, allowing you to tweak various elements of your theme. Whether it’s adjusting colors, modifying layouts, or setting up widgets and menus, the customizer has got you covered.
“Your theme is a canvas. Paint it with your creativity.”
Steps to personalize your theme:
- Add your logo by selecting “Upload Logo Here”.
- Use plugins like Starter Templates – Elementor, WordPress & Beaver Builder Templates to elevate the Astra theme into a professional-looking blog with pre-designed templates.
Customize Your Theme
Customizing your blog theme is the process of modifying the design and layout of your blog to fit your preferences and needs. This can be done through the WordPress Customizer, which allows users to change various aspects of their theme and site, from colors and layouts to widgets and menus. Additionally, you can customize your blog menus by following a detailed guide on how to do so.
When customizing your theme, you should also consider how your readers will interact with your blog. Consider adding static pages such as advertising, donations, and resources and submitting ideas and content pages. Additionally, you should be sure to add your own visuals, such as photos and videos, to your posts to make them more engaging.
Writing and Publishing Your First Blog Post

Writing and publishing a blog post is essential to creating a successful blog. Whether creating a news blog, a personal blog, or a professional blog, writing and publishing a blog post can help your new WordPress blog reach more readers and create a profitable blog. With WordPress blogging software, you can create your own WordPress blog on Bluehost in just a few hours and start your blogging journey.
Creating a blog post involves several steps, including deciding on a topic, writing the post, and adding images. You should also consider optimizing your post for SEO and adding links to external websites. Additionally, you may want to add a unique title to your post. Once these elements have been added, you’re ready to publish your post.
Publishing your blog post is the final step in creating a post and making it available to the public. Depending on your preferences, you can publish your post immediately or schedule it to be published later. Once the post has been published, you can share it on social media and invite readers to comment on the post.
Create Your First Post
Creating a blog post involves several steps, including deciding on a topic, writing the post, and adding images. It’s important to pick a topic that your readers will be interested in, and that fits with your blog’s overall theme.
Once you have decided on a topic, you can start to write your blog post. Remember that your blog post should be informative, engaging, and concise. When writing the post, you should also consider SEO tactics, such as using specific keywords, to help your post rank higher in search engine results.
Adding Visuals
Adding images and videos to your blog post can help break up long blocks of text and make your post more visually appealing. If you don’t have your own images or videos, you can source them from free image sites. Additionally, you can add a link to an external website to provide readers with additional information. Once you have all the elements of your post in place, you are ready to hit the “Publish” button.
Publish Your Post
Publishing your blog post is the final step in creating a post and making it available to the public. Depending on your preferences, you can publish your post immediately or schedule it to be published later. Some bloggers prefer to schedule their posts in advance to ensure they go live at the most optimal time. You can also use Akismet to help prevent spammy comments from appearing on your blog post.
Once you have published your post, you can start to engage with your readers by posing meaningful questions and inviting them to reply in the comments section. You can also use social media to share your post and reach a broader audience. Finally, don’t forget to back up your WordPress site on Bluehost regularly to ensure your blog post is safe and secure.
Now, you are ready to share your post with the world!
Adding Features to Your Blog With WordPress Plugins
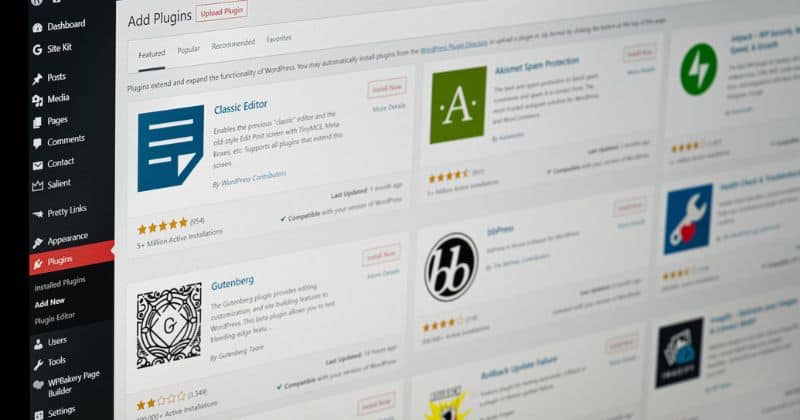
Introduction to Plugins
WordPress plugins enhance your blog’s functionality, making it more interactive and user-friendly. The WordPress Plugin Directory offers a plethora of plugins, ensuring you can tailor your blog to your vision. To add a plugin, click “Install Now,” and it will seamlessly integrate into your site.
Essential Plugins for New Blogs
Plugins offer various features, from contact forms to security measures. For those starting, essential plugins include:
- Akismet: Shields your blog from spam.
- Yoast SEO: Optimizes your blog for search engines.
- WordFence: Provides robust security.
- Really Simple SSL: Ensures your website’s security.
- GA Google Analytics: Monitors and tracks visitor activity.
Choosing the Right Plugin
Before adding a plugin, it’s crucial to verify its quality. Check its ratings and reviews, and ensure it’s sourced from a trusted provider. If monetizing your blog is in your plans, weigh the pros and cons, especially concerning potential traffic loss from affiliate programs. Always align your choices with your blog’s objectives.
Boosting Blog Visibility
For increased visibility, consider registering with Bing Webmaster. This step is pivotal for those aiming to profit from their blogs. By meticulously selecting plugins and joining platforms like Bing Webmaster, you’re paving the way for your blog’s success.
Backing Up Your WordPress Site on Bluehost
Ensuring the safety of your WordPress site on Bluehost is crucial. Let’s explore the straightforward steps to back up your content, ensuring you never lose your valuable work.

The Importance of Backups
Ensuring your WordPress site on Bluehost is backed up is crucial for content accessibility. Bluehost, a renowned hosting provider, offers several hosting packages.
Notably, their ‘Basic Plan’ features automated backups. To initiate a backup, sign up for a hosting package and get WordPress up and running.
Utilizing Backup Plugins
The most straightforward method to back up Bluehost is through WordPress backup plugins. Popular choices from the WordPress plugin directory include Jetpack and UpdraftPlus.
These tools not only facilitate scheduled backups but also provide off-site storage options. This dual functionality guarantees content safety even if there’s a hiccup with your hosting service.
Manual Backup: An Alternative
Manual backups are an option for those seeking an extra layer of security. This method involves using an FTP client to transfer files from the server to your computer. While it demands more effort, it’s a reliable safety net against potential hosting issues.
In essence, regular backups are a must to safeguard your content. Adopting a robust backup strategy lets you rest easy knowing your WordPress content remains protected.
Alternatives to Bluehost for WordPress Hosting

While Bluehost stands out as a prominent choice for WordPress hosting, it’s essential to recognize that it’s not the sole option. There exists a plethora of credible hosting services that cater to WordPress users. Notable mentions include:
- SiteGround
- DreamHost
- Hostinger
- HostGator
- A2 Hosting
Key Features to Consider
Each of these hosting platforms brings its unique set of features to the table. For instance:
- Some offer seamless WordPress installation.
- Others boast a comprehensive plugin directory for easy plugin discovery and installation.
- A few even provide free WordPress versions and complimentary theme selections.
It’s crucial to delve into the specifics of each service, weighing their features against their pricing structures.
“By researching the different WordPress hosting options available, you can decide which one is best for your blog.”
Over to You
Starting a WordPress blog on Bluehost is straightforward. After selecting a domain name and hosting plan, you can easily install WordPress via the Bluehost dashboard. Customize your blog’s appearance with themes and enhance its functionality with plugins. Once set up, writing and publishing your first post is a breeze.
While Bluehost offers a seamless experience, other hosting options like HostGator and A2 Hosting exist. However, for a hassle-free start, Bluehost stands out. Thinking of starting your own blog? Bluehost might be your best bet.
FAQs
Is Bluehost good for starting a blog?
Bluehost is a reputable web hosting provider often recommended for starting a blog. It offers easy WordPress integration, a free domain for the first year, and 24/7 customer support. Its uptime and loading speeds are competitive, making it a reliable choice for new bloggers.
How much does it cost to start a blog on Bluehost?
Bluehost offers various hosting plans, including WordPress Hosting at $2.95/mo, BASIC for a single blog at $2.95/mo, CHOICE PLUS with added security at $5.45/mo, and PRO for optimized resources at $13.95/mo. Prices are based on a 36-month term and may auto-renew at regular rates. Always check Bluehost for current pricing.
How to start a WordPress blog on Bluehost for Beginners 2026?
To start a WordPress blog on Bluehost for beginners in 2026, visit Bluehost’s official site. Click the green “Get Started Now” button. Choose your desired hosting plan; BASIC and CHOICE PLUS are preferred by many. Next, input your chosen domain name. Follow on-screen instructions to complete the setup. Always refer to Bluehost for detailed steps and updates.
How much does it cost to host a blog on Bluehost?
Starting a blog on Bluehost requires purchasing a hosting plan. While WordPress is free with Bluehost, hosting plans vary: BASIC is $2.95/mo, CHOICE PLUS is $5.45/mo, and PRO is $13.95/mo (based on a 36-month term). Additionally, a domain name is included for the first year. Always consult Bluehost for the most up-to-date pricing.